
Picture this:
- You’ve graduated with your shiny new diploma.
- Survived harrowing interviews.
- Received the proud phone call saying you’re hired!
- You’re ready to start teaching!
If you’re anything like me, you and your broke-newly post college-self drive out to the nearest dollar tree to celebrate your new classroom!
The nice thing about the dollar tree is they have an entire section dedicated to just education. Everything in that section seems tempting because you honestly don’t have a direction yet for how you want to go regarding decor, and everything is the same price, so the world is your oyster.
The problem with this is threefold:
- You’re buying too many items that don’t cohesively go together, essentially dumping money away for the ones you don’t actually use.
- The quality isn’t the best, and many will need to be replaced sooner rather than later because they will fall apart.
- You’re buying things that are educational wall clutter.
Let’s start by looking at point number one. My very first year, I decorated using everything that was available to me, meaning each corner or area of my room had a different decoration pattern or theme to it, but none of them actually matched each other.
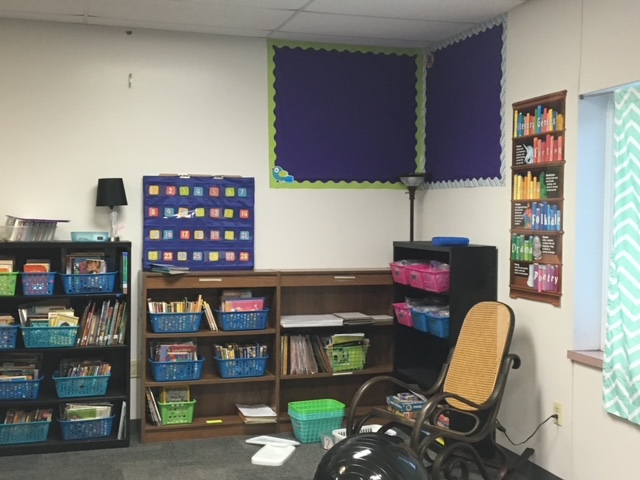
I poured blood, sweat, and tears into making this classroom come alive and be inviting to my kids, and it was. For some students, though, it was overwhelming. I had too many colors and patterns going on; it actually served as a distraction for some of my scholars. I also was so intent on putting up decorations that I lost out on valuable academic real estate. (Stay tuned; we’ll talk about that concept in greater detail when we talk about wall clutter!)
Moving onto point number 2, QUALITY:
Let’s face it, kids are rough on classroom materials. Kids during your beginning years of teaching tend to be even more so because often newer teachers are still learning how to best handle classroom management and establishing routines and procedures, which kids have been known to take advantage of.
Dollar tree things aren’t inherently bad:
- In fact, there are many ways that I think they are great and would 10/10 purchase again for my classroom.
- However, with that being said, I think we also can spot the difference between a Dollar Tree bin and an IKEA bin.
When you are thinking of purchasing decor for your classroom, it’s important to picture the functionality behind how you plan on using it. Don’t blindly purchase things because you think you might find a use for it! I’ll say it a little louder, one more time for the people in the back:
DON’T BLINDLY PURCHASE THINGS BECAUSE YOU “MIGHT” FIND A USE FOR IT!
Take the dollar tree caddy for example.

It’s a fine thing to use to hold your teacher supplies for small group. It could make a great sub bin for substitute teacher supplies.
What this caddy is not great for is daily usage by students, science or math labs or investigations. It’s flimsy, small, and full of holes on the side that let small pieces like erasers or science experiment pieces fall out. Consider setting yourself up for success by investing more money in the things your students will use directly and on a regular basis.
Yes, I know that money is tight when you get started, and I’m not saying to invest a ton of your money into quality things all at once; it’s perfectly fine to get things over time and in pieces!
I’m just advising intentionality and mindfulness when you’re shopping.
In an effort to save money but still have cute decor, I actually ended up stealing my own time from myself and adding more headaches several different times. For example, the summer before my first year, I decided to give my ugly metal teacher desk a facelift by adding cheap but cute scrapbook paper to the front of it using painters tape layered with double-sided tape and an owl wall decal.
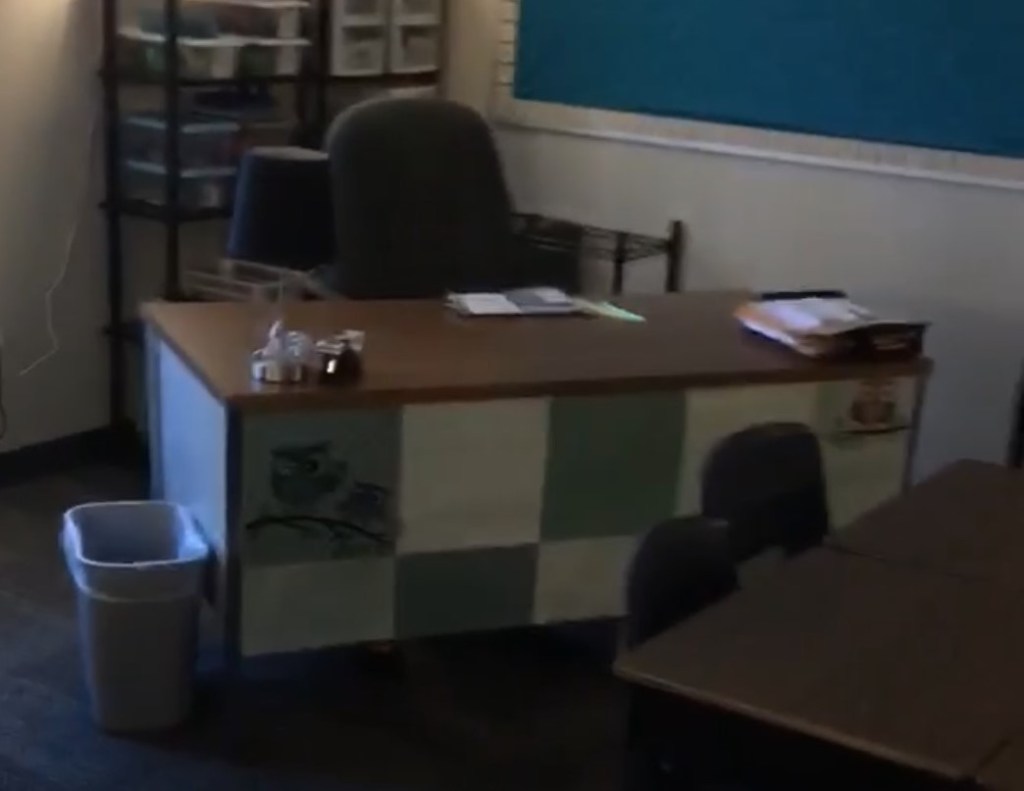
Poor image quality aside (someone forgot to tell new teacher me that we would one day have a blog :]), the ending result was adorable. Did I spend over 4 hours on it, getting everything perfectly cut and lined with tape? Yes, I sure did. With zero regrets. This lasted a grand total of 3 days in my classroom before it was ripped off my desk by a fidgety student leaning back in his chair and falling into my desk. For the rest of the week, I continued to “repair” it, but the damage was done, and eventually, the papers stopped sticking.
I ended up tacking one of my favorite paper squares onto the wall in my classroom to remind me to be intentional with my decorating choices and mindful of the amount of energy I will have to spend to create and maintain any decor I do decide to use.
The moral of the story:
- DIY projects can be great; they can also end up being less durable than just purchasing the regular product from the store.
- Contact paper would have been much more effective and lasting; it would have saved me time and frustration. However, I wanted to work within my budget and I decided to use scrapbook paper and dollar tree tape instead of just buying quality contact paper.
Remember, Rome wasn’t built in a day; your classroom won’t be either. It’s okay to grow only certain areas at a time in your classroom each year.
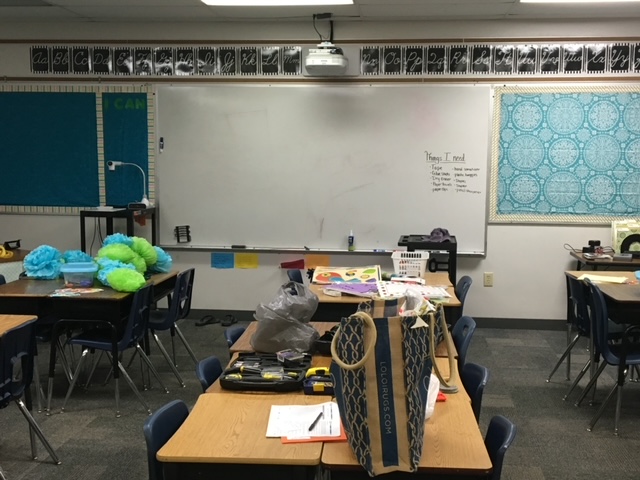
Lastly, and honestly most importantly, we have wall clutter. I LOVE a good sign or encouraging quote; in fact, my entire wall in my college dorm was filled with signs.

What I’ve come to find out I don’t love is when I find that my encouraging poster I bought because it was inexpensive ends up taking the spot on my wall that an anchor chart about division should be in.
Think about using your wall space, and decorating with vocabulary-rich content. The top and side of your whiteboard could be labeled with rows and columns. Your door could be labeled with perimeter and area to provide visual representation of the concepts. You could use the door of a cabinet or closet as a living quote wall, where students write down quotes that resounded with them from books they are reading.
There are lots of creative ways to fill in your wall space, but limit your visual wall clutter. This isn’t to say that you can’t have encouraging or “fluffy” signs and posters up in your room because:
- It’s your room– you do you.
- You are responsible for teaching the whole child, not just dumping academic content into them; filling up a child with encouragement and affirmations is also a worthwhile part of being their teacher.
Just think consider your signs with intentionality. If you have a huge amount of wall space available, save it for an anchor chart; use the smaller spaces to add less academically hearty supports.
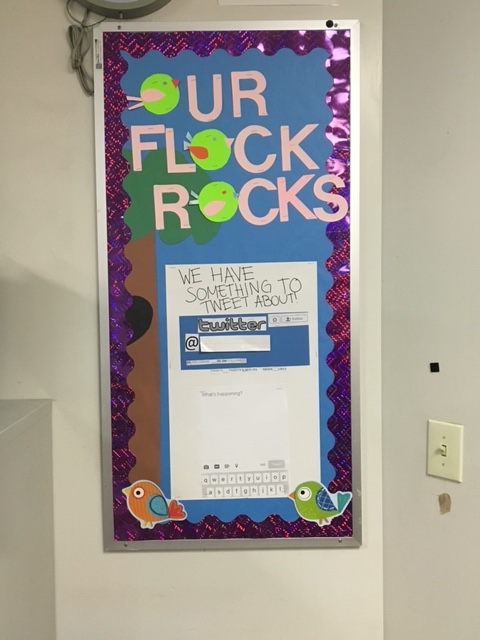
For example, I have loved the quote from the book Wonder, “If given the choice to be right or be kind, choose kind.”
I used to display it right next to the doorway when students walked into the classroom because it gave all students the ability to read it, and it was a great reminder of a classroom value I wanted to instill, without taking away limited wall space that I could have an academic poster or anchor chart in.
The most meaningful and cost-efficient way that I’ve found to decorate a classroom is to pick a simple color school theme:
- Think 1-2 accent colors, and 1-2 neutral colors, and buy cardstock in those colors.
- I would also invest in a classroom laminator if you have the ability to, and some laminator sheets.
In regards to laminators:
- I’ve owned both the brand name Scotch-Brite laminator, as well as off-brand laminators purchased from grocery stores.
- There is a difference in some of the amenities to the laminators, but in regards to the effectiveness of how it works, they have been basically the same.
Don’t stress buying the best laminator out there, but having one does help you to preserve the work and paper investment you’re putting into decorations. Remember, kids are destructive. If you laminate things, you give yourself the ability to keep things looking nice and new for years. I would think about how glossy you want your laminating sheets; the matte ones are a little better for wall decor because they pick up less glare which can limit students’ visibility.
Use your cardstock and try creating some of the pieces you might want to decorate your classroom with!
- Think about what vocabulary or concepts are important for the grade level you are going to be working in.
- If you aren’t sure what they are for that grade yet, I would reach out to your teammates in the school, or even think about asking on a Facebook teachers’ forum.
- Consider consulting someone in the curriculum from your school or district, and see if they have any ideas or suggestions.
- Think about what organizational systems you want to use to organize papers, folders, grading.
- Even consider how you want to arrange/showcase classroom materials.
You can use your paper to create labels, posters, and bulletin board letters and borders just to name a few. What’s nice is that your classroom will begin to come together and feel cohesive and decorated with the matching color scheme, without you having to spend a lot of money to achieve that look.
A pro tip for creating your own resources to decorate your classroom on a budget is to create using PowerPoint, Google Slides, or Keynote. Using a slideshow platform, instead of a traditional typing platform like Word or Google Docs allows you much more flexibility to arrange and create what you’re looking for. Go ahead and subscribe to my email list so that you will be the first to know when my in-depth tutorial blog post goes live on how to create your own decor resources in your classroom!
If you’re interested in some great already created decorations you could use in your classroom:
- Feel free to join my email list and get access to my bulletin board freebie in the Free Resource Library!
- You can also check out my TPT store at There’s a Plan for That, and check out some great ready-made classroom decor designed to print and go and give you back some of your precious time!


Leave a comment